
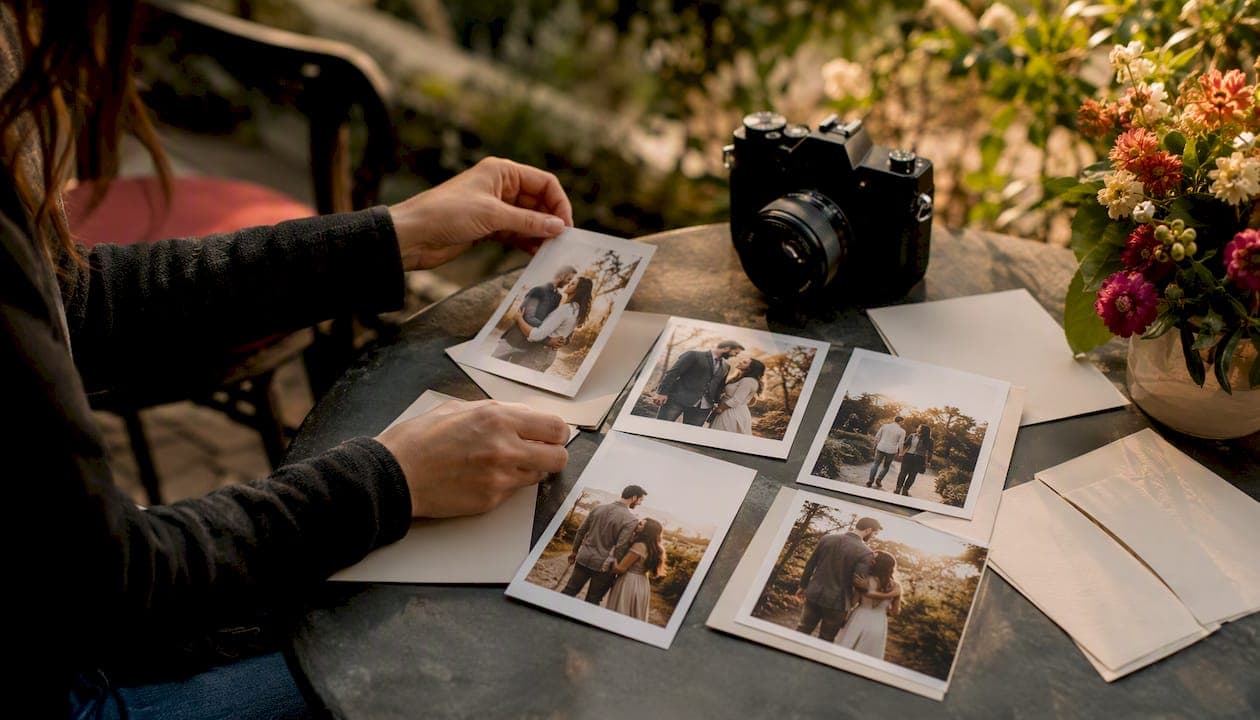
The fastest route to a save-the-date you'll be proud of is this: pick an image with genuine negative space (open sky, a plain wall, empty foreground) and export it as a 300 DPI file at your final card size, which for a standard card means at least sufficient pixel dimensions for high-quality print output. Get that combination right and everything downstream, layout, printing, legibility, sorts itself out.
Before you touch a template, run through this:
- Orientation: shoot or select both a landscape and a portrait version of your favourite shot, since you won't know your final card format until you've browsed layouts.
- Negative space: choose a frame where the background gives text somewhere clean to sit, not a shot where your faces fill every inch.
- Export settings: ask for the full-resolution original, not a version pulled from Instagram or a text thread.
Once you've shortlisted two or three images, request a high-resolution export from your photographer straight away. Don't wait until you've chosen a printer. That file needs to exist before you can do anything else.
Pro Tip: Always order one physical proof before you commit to your full print run. Screens lie about colour and crop far more than people expect, and a £3 proof card is a lot cheaper than reprinting 150 invitations.
Key Takeaways
Print-ready save-the-date photos combine deliberate negative space, correct file resolution, and a physical proof check before the full order goes to print.
| Point | Details |
|---|---|
| Choose the right shot | Pick images with clean backgrounds, visible expressions, and negative space for text. |
| Hit the file spec | Export at 300 DPI, minimum sufficient pixel dimensions for high-quality print output for a standard card. |
| Book with buffer | Schedule your shoot 8 to 10 months ahead to cover editing, proofing, and printing time. |
| Always order a proof | Check colour, crop, and font legibility on a physical card before committing to the full run. |
| Work with a photographer who plans for print | Pixels Pro captures both orientations and negative-space frames as standard, then delivers full-resolution, print-ready files. |
Table of Contents
- Save the date photo ideas that actually print well
- How do you plan a save-the-date photoshoot?
- What file specs do you need for a print-ready save the date?
- Which card layout suits your photo?
- How do you order save the dates without costly mistakes?
- What should a save the date card actually say?
- When should you send save the dates, and how many?
- What does a photographer check before delivering your files?
- How Pixels Pro turns your shoot into a print-ready card
- Where to find templates, proofs and more inspiration
- Frequently asked questions
- Sources
Save the date photo ideas that actually print well
Not every gorgeous engagement shot survives the trip from screen to 4 by 6 inch card. The photos that hold up are the ones with clean backgrounds, visible expressions, and enough breathing room for a designer to drop in your names and date. Here are the styles that consistently deliver:
- Candid, in-motion shots: laughing mid-walk, a spontaneous look between you two. These read as authentic rather than posed, and they photograph well because genuine expressions survive small-scale printing better than stiff smiles.
- Classic portrait: simple, centred, well-lit. This is the safe, reliable option for couples who want the date to be the star, not the scenery.
- Location-led shots: the café where you met, your future home, a skyline that means something. These work because guests recognise the story even before reading the card copy.
- Seasonal scenes: autumn leaves, a snowy street, spring blossom. Seasonal imagery signals your wedding's mood at a glance and gives designers strong colour palettes to build around.
- Pet-inclusive shots: your dog wearing a tiny "save the date" sign rarely fails to get a reaction, and pet photos tend to generate the most engagement on social shares.
- Hobby-themed shoots: surfing, hiking, board games, whatever you actually do together. These print well because the setting does most of the storytelling for you.
- Black and white: timeless, forgiving of mixed lighting, and it makes typography easier to layer over the image without colour clashes.
- Editorial-style shots: styled, fashion-forward posing with strong composition. This suits couples who want their card to feel closer to a magazine spread than a snapshot.
Ideas like these, from seasonal themes to travel-inspired shoots, work best when they reflect something true about you rather than props stacked in for effect. A chalkboard sign or a banner can add charm, but the strongest cards lean on story, not accessories.
Pro Tip: Pick one visual theme and stick to it across every photo you shortlist. A card mixing a beach sunset with a snowy portrait confuses guests about your wedding's tone before they've even read the date.
How do you plan a save-the-date photoshoot?
Booking early solves more problems than people expect. An engagement or save-the-date session works as a dress rehearsal: showing up in front of a camera together before the wedding day builds comfort and produces more natural images for both the card and the ceremony itself. Here's the sequence that keeps you on schedule:
- Book your shoot several months before your wedding to allow sufficient time for editing, proofing, and printing. That buffer accounts for editing, proofing, and printing time, particularly if you're mailing six months ahead of a local wedding.
- Brief your photographer explicitly. Mention that you need negative space, both orientations, and full-resolution files delivered afterwards, not just a curated online gallery.
- Choose a location with meaning, not just good light. A spot tied to your relationship photographs with more warmth than a generic scenic backdrop.
- Shoot during golden hour or on a softly overcast day. These conditions produce flattering, printable tones that hold up once ink hits paper, unlike harsh midday sun.
- Review proofs, then finalise your edits, then order. Don't skip proofing to save a week, it's the stage that catches problems while they're still cheap to fix.
Outfits matter more than most couples assume. Coordinate colours and tones rather than matching outfits exactly, and avoid busy patterns that fight with the background. Bring props only if they mean something, a shared instrument, a dog, a vintage car, rather than generic accessories bought for the occasion.
Photographers recommend capturing multiple orientations and generous negative space precisely so you're not locked into one layout later. Ask for this explicitly; it rarely happens by accident.
What file specs do you need for a print-ready save the date?
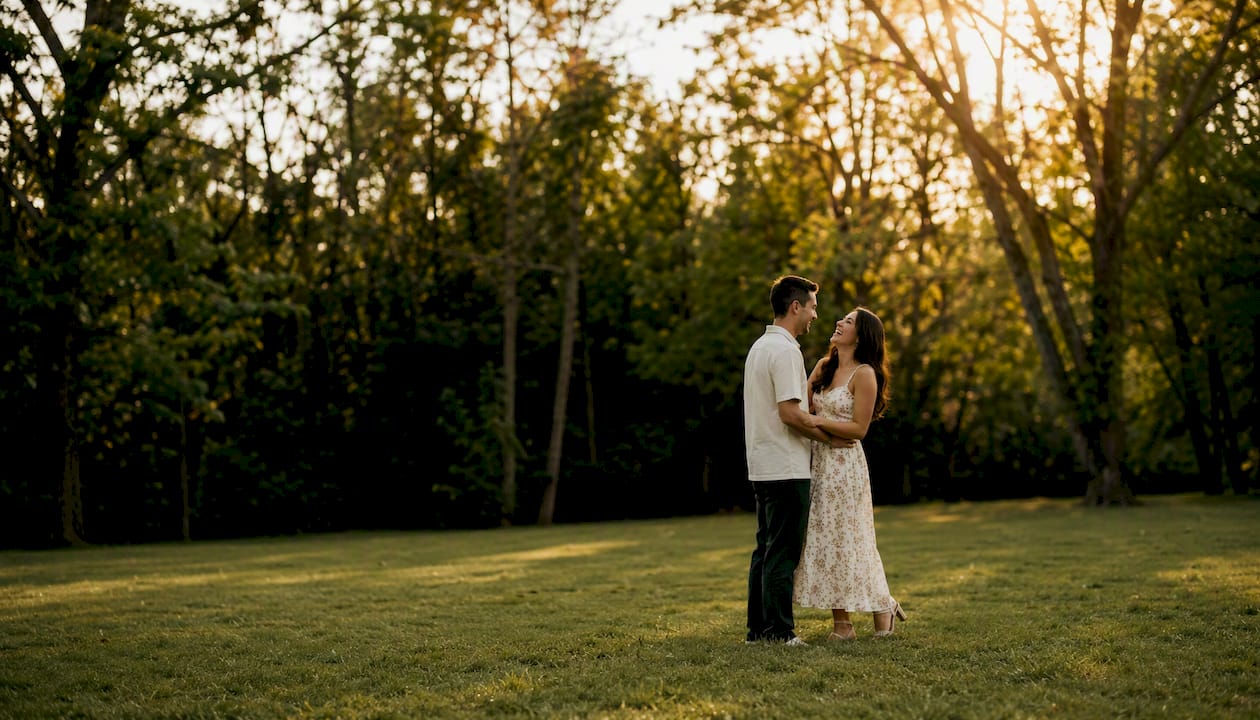
Print quality comes down to numbers most couples never think about until a card arrives blurry. Industry standard is 300 DPI at final print size, and for a typical save-the-date card that translates to a minimum of sufficient pixel dimensions for high-quality print output. Below that threshold, printers either reject the file or produce visibly soft, pixelated results.
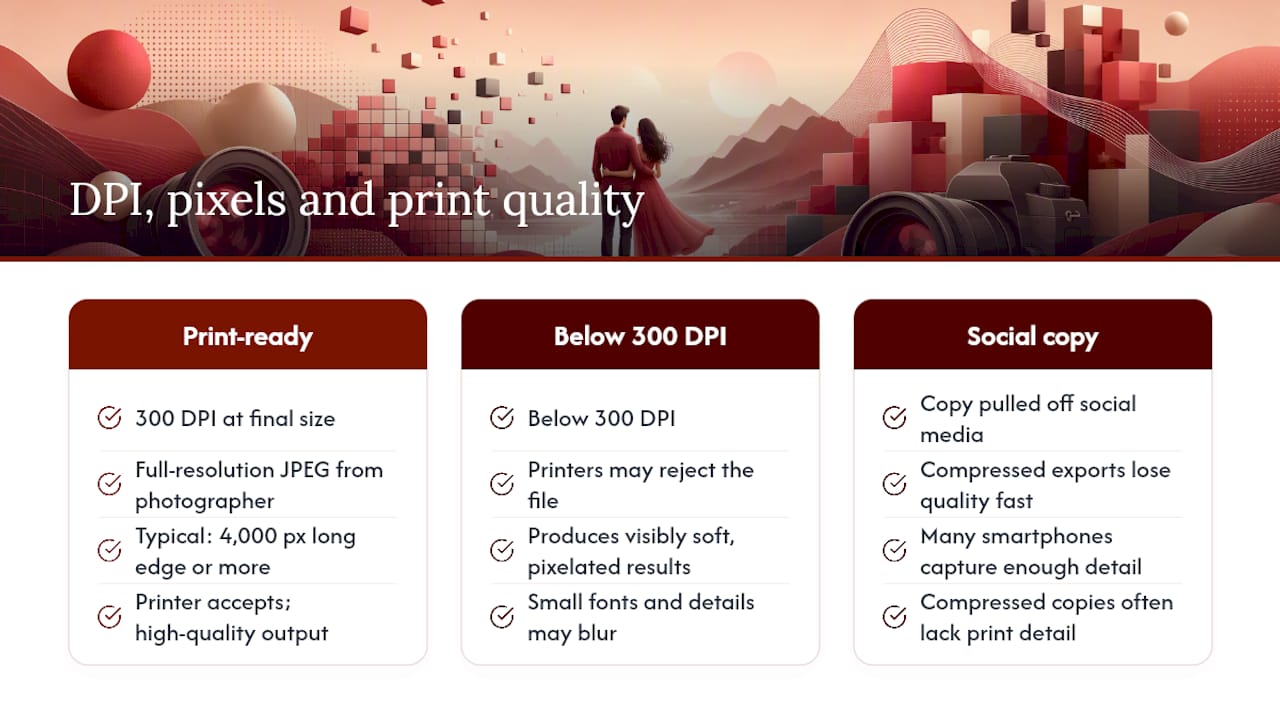
Ask for full-resolution JPEGs straight from your photographer rather than a copy pulled off social media. Many smartphone cameras genuinely capture enough detail for print, but compressed exports lose that quality fast; a proper delivery file typically runs 4,000 pixels on the long edge or more.
Leave a safe margin around anything essential, faces, hands, text you plan to add. Printers trim cards after the fact, and details sitting within a few millimetres of the edge risk getting cut off entirely. Shoot wider than feels natural; you can always crop in later, but you can't recover detail that was never captured.
Pro Tip: Once your card design is finalised, order a single physical proof and check three things under natural light: skin tone accuracy, whether any faces or text sit too close to the trimmed edge, and whether small fonts remain legible at actual size.
Which card layout suits your photo?
Your chosen photo should dictate your layout, not the other way round. A wide landscape shot with sky above the couple's heads suits a horizontal card with a text band across the top or bottom. A tighter, vertical portrait with foreground space works better as a vertical card, letting the date sit naturally beneath the image.
Square cards flatter centred, symmetrical shots, think a couple standing dead centre against a simple backdrop. Postcard-style layouts give you room for a photo on one side and full wording on the reverse, which suits couples who want more than a name and date on show. Arch die-cut cards frame a single strong portrait beautifully but waste a busy or cluttered background, since the curved trim crops in tight. Magnets work well with simple, high-contrast images because the format tends to be smaller and less forgiving of fine detail.
A few design rules hold across almost every layout:
- Keep text over the plainest part of the frame, sky, wall, blurred foreground, never over a face or busy pattern.
- Use a solid colour block or panel behind text if your photo has no natural negative space.
- Choose a font that contrasts clearly against the image tone: dark serif on light backgrounds, white or cream sans-serif on darker ones.
- Reserve multi-photo collages for couples who genuinely can't choose a favourite; a single full-bleed image almost always reads as more polished.
Designers need images with deliberate blank space to work with, so briefing your photographer to capture frames with empty sky, plain walls, or open foregrounds pays off directly at this stage.
How do you order save the dates without costly mistakes?
Templates and preview tools exist precisely so you don't discover a cropping problem after 150 cards have shipped.
- Paper stock matters more than people expect. Smooth matte suits editorial-style portraits; pearl or shimmer finishes flatter warm, golden-hour tones; luxe or heavyweight card stock signals a more formal wedding; recycled stock suits couples who want an eco-conscious statement without sacrificing print quality.
- Magnet finishes work well as keepsakes guests actually display, though they cost more per unit and usually ship slower than flat card stock.
- Always order a physical proof first. Check colour accuracy against your screen, confirm nothing important got trimmed, and read your smallest text at arm's length to be sure it's legible.
- Factor turnaround honestly. Standard printing typically runs one to three weeks, and destination mailings need extra buffer for international postage.
A save-the-date photo is the most popular format precisely because it works across all of these variables. Upload at 300 DPI, request a designer proof, and you've removed almost every common point of failure before it costs you money.
What should a save the date card actually say?
Guests need four things at a glance: your first names, the full wedding date, a general location (city or region is enough), and a short line such as "invitation to follow." Everything else is optional.
- Wedding website: worth including once it's live, so guests can bookmark it early rather than hunting for it later.
- RSVP note: skip formal RSVP language at this stage; save-the-dates announce, they don't request a response.
- QR code: useful for destination weddings where guests need travel details fast, less necessary for a simple local ceremony.
A few short wording options, adjusted for tone:
Formal: "Save the Date. Sarah & James. 14th June 2027. Coventry, United Kingdom. Formal invitation to follow."
Friendly: "We're getting married! Mark your calendars, 14 June 2027, in Coventry. More details soon!"
Destination: "Save the Date for our wedding in the Cotswolds, 20th September 2027. Full details and travel info coming your way."
On typography, bold your names and the date, since those are the two facts guests must retain. Keep the location and supporting line in a lighter or smaller weight so the card doesn't compete visually with your photo.
When should you send save the dates, and how many?
Timing depends almost entirely on how far your guests are travelling. For a local wedding, send save-the-dates roughly six to eight months out. For a destination wedding, or any ceremony landing on a holiday weekend, push that to nine to twelve months, giving guests enough runway to book flights and take time off work.
Working backwards from a six-month local mailing target, allow two to four weeks for editing, one to two weeks for proofing, and one to three weeks for printing and shipping. That's why booking your photoshoot eight to ten months ahead, rather than six, keeps you comfortably inside deadline rather than scrambling.
- Count households, not guests. One card per household or couple, not per individual, cuts your order significantly.
- Add 10 to 15% extra. Keepsakes, late additions to the guest list, and the odd misprint all eat into your count faster than expected.
- Choose magnets for higher visibility, since they tend to stay stuck to a fridge rather than filed away and forgotten, useful if your guest list skews toward people who need reminding.
- Confirm every mailing address before ordering, not after, so you're not reprinting envelopes at the last minute.
- Include your wedding website link if it's ready, since guests will start planning travel the moment the card arrives.
A quick logistics checklist before cards go in the post: postage rates confirmed for international mail if needed, return address printed or stamped, and any QR code tested on multiple phones before you commit to the full run.
What does a photographer check before delivering your files?
A dependable save-the-date session usually produces a shot list that covers more ground than couples expect: full-bleed frames with the couple filling most of the image, negative-space frames with deliberate empty background, both portrait and landscape versions of the strongest poses, and at least a few candid, in-motion shots that capture something more natural than a posed smile.
Lighting discipline matters as much as composition. Photographers shooting for print favour soft, directional light, golden hour or open shade, over harsh midday sun, because flat, even lighting holds its tone far more reliably once it's printed rather than viewed on a backlit screen.

File delivery is where a lot of good sessions go wrong. A proper handover includes the original full-resolution files (not screen-optimised exports), minimal compression, and a sensible naming convention so you're not hunting through 400 identically named images the week before you need to order cards.
Pro Tip: Ask your photographer to flag one "safety shot", a clean, simple portrait with generous negative space, even if it's not your favourite from the session. It's the frame that saves you when your top choice turns out to crop badly or clash with every layout you try. Requesting an early sneak-peek of two or three images, rather than waiting for the full gallery, also lets you start browsing card templates while editing is still underway.
A note from behind the camera
Working with couples on save-the-date sessions, the thing I emphasise most isn't pose or wardrobe, it's giving the image room to breathe. Couples often arrive wanting every frame tightly cropped on their faces, understandably, since that's what looks best scrolling through a phone gallery. But a card designer needs somewhere for text to sit that doesn't fight with your expressions.
One recent example stuck with me: a couple loved a tight, joyful shot of them laughing, but when we tried it against three different card layouts, the date kept landing across someone's forehead. We reshot a wider version of the same moment fifteen minutes later, same laugh, same energy, just with sky above their heads instead of a tight crop. That single change, more negative space, nothing else, is what let the card actually work across every layout they tried afterwards.
How Pixels Pro turns your shoot into a print-ready card
Pixels Pro is the alternative to a generic photo studio for engaged couples in Coventry who want save-the-date images that actually survive the trip to print, not just a pretty online gallery. Sessions are built around exactly what a card designer needs: both orientations captured on purpose, negative-space frames included as standard, and full-resolution files delivered without the compression that ruins so many phone-sourced images.
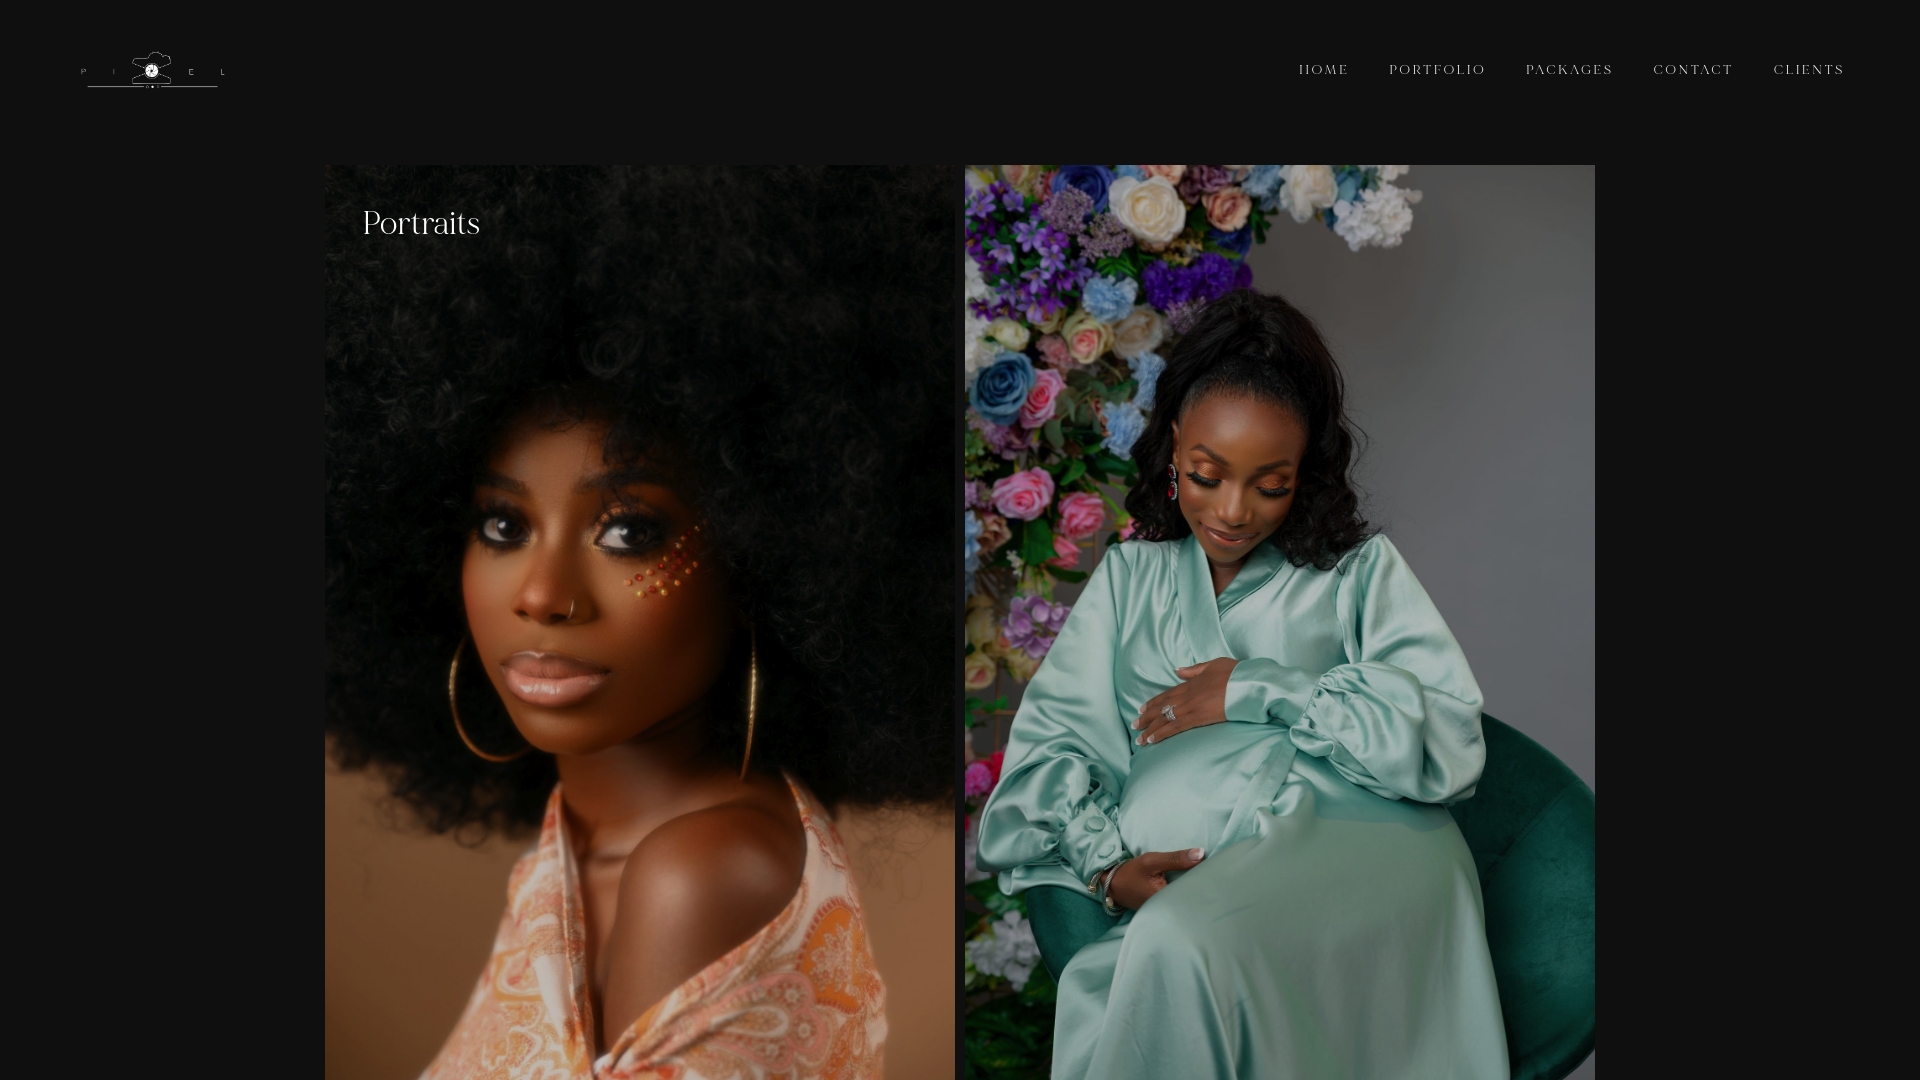
Every package includes edited, high-resolution files exported ready for print, so there's no back-and-forth requesting a "bigger version" after the fact. Proofs are shared early, meaning you can start browsing templates and layouts while final edits are still being finished, rather than waiting on the full gallery before you make a single decision. Browse the portfolio to see how past sessions were composed with printing in mind, then get in touch to book a date that leaves enough runway before your mailing deadline. And once your cards are designed, order one physical proof before the full run, it's the cheapest insurance you'll buy all wedding season.
Where to find templates, proofs and more inspiration
A handful of resources cover most of what couples need beyond this guide. Snapfish offers straightforward templates and card previews, useful if you want a fast, budget-friendly ordering process. Vistaprint has a wide range of layouts and paper finishes, including magnets, with solid proofing tools built into checkout. Zazzle leans more design-forward, with strong customisation options and creative photo concepts worth browsing before you shoot. Pinterest remains the best single source for visual inspiration, search "save the date poses" or "save the date layout ideas" and you'll find hundreds of real examples across every style covered here. And for the photography itself, Pixels Pro's portfolio shows how a session built around print requirements from the outset actually looks once it's finished.
Frequently asked questions
What resolution do save the date photos need to be for printing? Aim for 300 DPI at your final print size, which works out to a minimum of roughly sufficient pixel dimensions for high-quality print output for a standard postcard-sized card. Always request the original file from your photographer rather than a version downloaded from social media, since compression there strips out the detail printers need.
How far in advance should you book a save-the-date photoshoot? Book roughly 8 to 10 months before your wedding date. That buffer covers two to four weeks of editing, one to two weeks of proofing, and one to three weeks for printing and shipping, comfortably hitting a six-month mailing target for local weddings.
Should save the date photos be landscape or portrait? Capture both. You won't know your final card layout until you've seen a few template options, and having both orientations available means you're never forced into a crop that cuts off something important.
Do save the date cards need a return address or postage information printed on them? That depends on your printer and mailing method rather than the photo itself, but confirming addresses and postage before you order avoids delays once cards are ready to send.
What's the difference between engagement photos and save the date photos? Engagement photos are often a broader, more relaxed session capturing your relationship generally, while save-the-date images are a curated subset specifically chosen and cropped for legibility, negative space, and print requirements on a small card.
Sources
- Photo save the date ideas: designs, poses & tips - Paperlust
- Engagement photo basics
- 10 creative save the date photo ideas to tell your love story | Zazzle Ideas
- Save the date photos: ideas for announcing your wedding - Julien Kibler